
Water Me, Please!
A tale of how I built a water level sensor to monitor my bamboo’s water supply. When water is depleted, it tweets ‘WATER ME FOOL’.
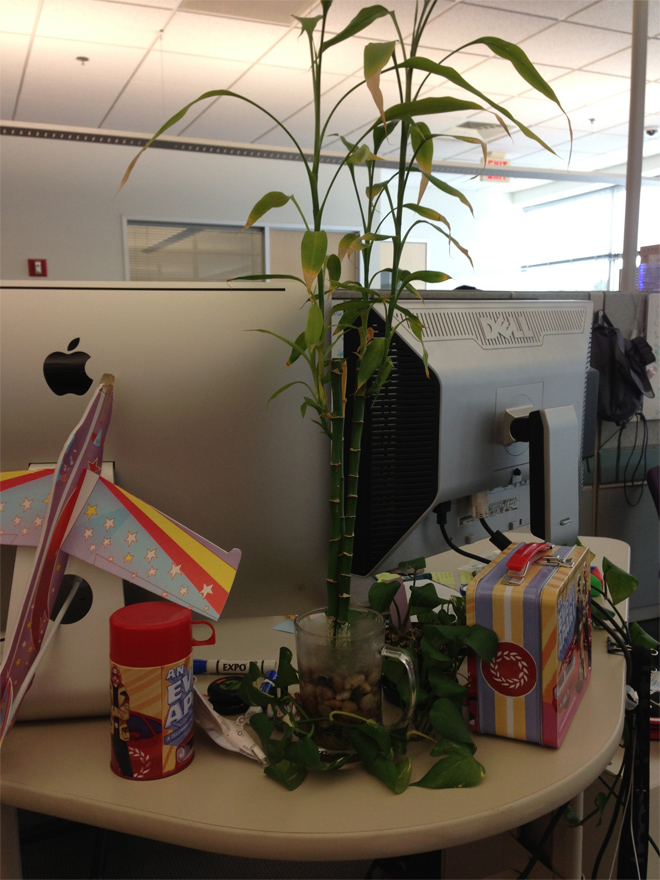
My bamboo is dying.
I’ve had my bamboo plant ever since I started working at my current company. It’s a nice addition to my office desk, with it being green and all. The problem is, I always forget to water the plant. The yellowed, coiled up leaves are my only reminder. I have no idea how this plant has made it this far.
Let’s Fix It
There are many ways to “fix” this. One could simply set a recurring alarm on a phone every 3 or so weeks, as a reminder to water the bamboo. It’s the easiest route, but there’s certainly no fun involved.
What if the plant told me that it needed water? This isn’t a new idea, but I had an Arduino Uno collecting dust. I think it’s time to make use of it.
Arduino to the Rescue
The requirements for this new system would be simple.
- Accurately notify me when the water level is low
- Simple to implement
Diving deeper into (1), the system should publish a tweet to its feed when it is deprived of water and when its been rescued.
Here’s how I implemented it.
Hardware
I read this blog and used their design for the water level sensor. For my design, I’m using one 10kΩ and five 2.2kΩ resistors in series. Here’s the schematic drawing:
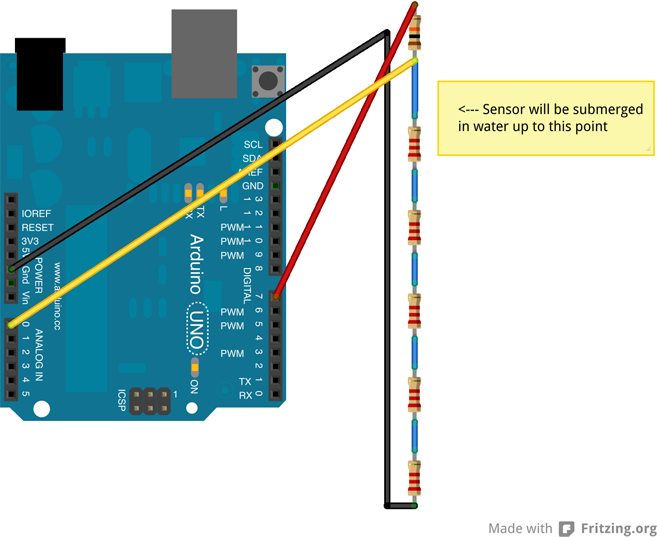
The theory behind this is that when the when the sensor (the five 2.2kΩ resistors) is submerged into water, the sensor gets shorted resulting in a change in voltage. By measuring this voltage change, we can determine when water level is low.
Sensor measurements are read in through analog sensor A0. Power is programmatically applied via pin 7 only when measurements are needed. This is to limit electrolysis.
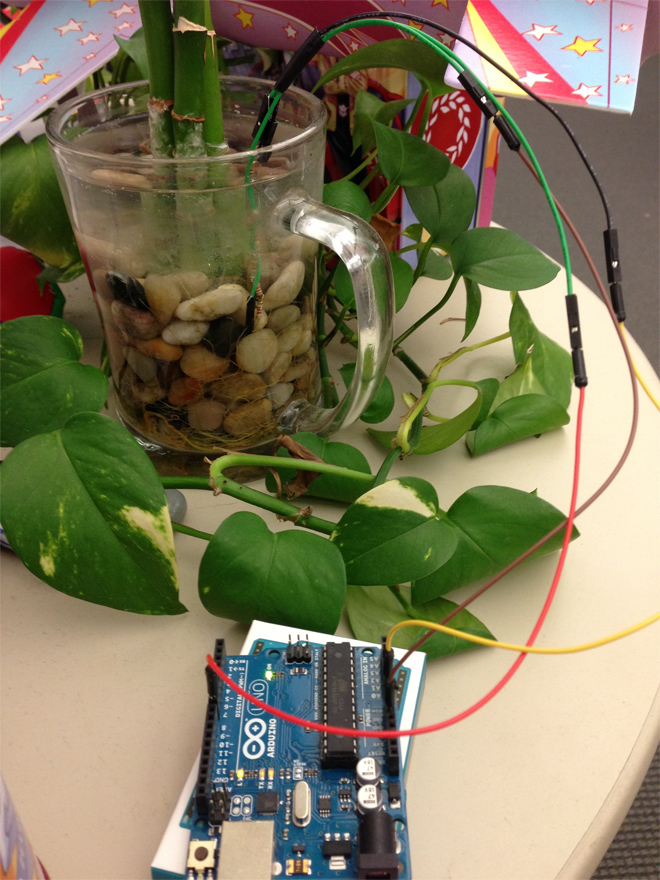
And here’s the prototype:
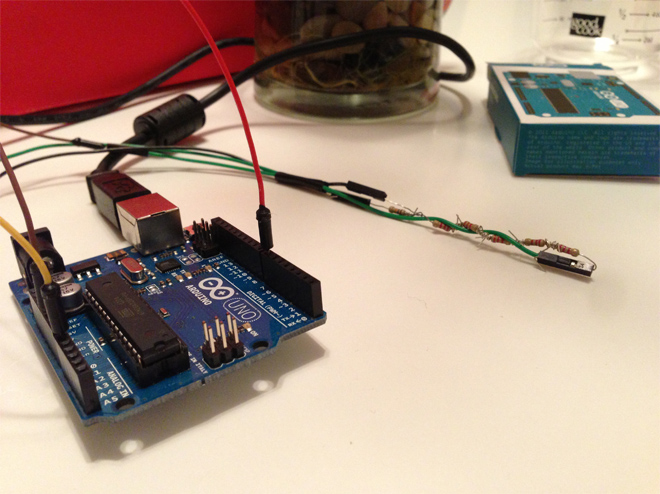
It works like a charm. The raw data readings range from 540 (when it’s dry) to around 350 (when its submerged in water). The values don’t mean anything. All the software cares about is when the measurement has surpassed the IM_DYING_GIVE_ME_WATER threshold. This value is set to 520.
Software
I wrote a node.js script that interfaces with the Arduino to collect readings from the water sensor. I’ll explain the gist of how the script works here. For the full source code, checkout my repo.
The node.js script uses duino. Its a neat, lightweight framework for working with Arduinos in node.js. As per their instructions, I’ve uploaded the src/du.ino sketch onto my Arduino. Now I can operate the Arduino with javascript. Awesome.
The water sensor code is in lib/sensor.js. Inside the module you’ll find the WaterLevelSensor class. When instantiated, this object will create a new arduino.Board object at a baudrate of 9600, set up the analog sensor at pin A0, and set the pin mode of pin 7 to ‘OUT’. Pin 7 is used to toggle the power to the sensor. Here’s the code.
// our water level sensor
var WaterLevelSensor = function (options) {
  options = options || {};
  this.debug = options.debug || false;
  this.pin = options.pin || 7;
  this.sensor_pin = options.sensor_pin || 'A0';
  this.baudrate = options.baudrate || 9600;

  // This will be used to determine when to tweet
  this.IM_DYING_THRESHOLD = 520;

  var self = this;

  this.board = new arduino.Board({
    baudrate: this.baudrate,
    debug: this.debug
  });

  this.sensor = new arduino.Sensor({
    board: this.board,
    pin: this.sensor_pin,
    throttle: 100
  });

  this.board.on('ready', function () {
    // set pin to out mode
    self.board.pinMode(self.pin, 'out');

    self.emit('ready');
  });
};
In order for the object to emit an event on the ready state, it must inherit events.EventEmitter.
// make it emitterable
util.inherits(WaterLevelSensor, events.EventEmitter);
Finally, it defines the measure method. The code powers the sensor by setting pin 7 to HIGH and then takes the mean average of five measurements. The final value is passed to a callback. Lastly, power pin (7) is set to LOW to power off the sensor. This is important because we don’t want DC current to continuously flow through the resistors in the water and cause corrosion via electrolysis.
// measures for 5 reads and calls callback with average value
WaterLevelSensor.prototype.measure = function (callback) {
  var self = this,
    readCount = 0,
    measurements = []; // running list of measurements

  // send 5V to pin to enable sensor
  this.board.digitalWrite(this.pin, this.board.HIGH);

  // read from sensor
  var readCallback = function (err, value) {
    measurements.push(parseInt(value, 10));

    if (measurements.length === 5) {
      var median = getMedian(measurements);

      // reset mode
      self.board.digitalWrite(self.pin, self.board.LOW);
      self.sensor.removeListener('read', readCallback);

      // we're finished, evoke the callback
      callback(median);
    }
  };

  this.sensor.on('read', readCallback);
};
Here’s an example of how the WaterLevelSensor object is used.
var sensor = new WaterLevelSensor();

// on ready state
sensor.on('ready', function () {
  setInterval(function(){
    sensor.measure(function (value) {
      // If the value exceeds threshold, tweet.
      if (value > sensor.IM_DYING_THRESHOLD) {
        // tweet it
      }
    });
  }, 300000); // measure every 5 minutes
});
There you have it. A homemade Botanicalls made from a bunch of resistors, jumper wires, an Arduino, and node.js.
Next Steps
Although the code does its best to limit corrosion, the resistors are still exposed to the elements and will naturally corrode. Unfortunately, the resistors on my sensor have already rusted due to extensive testing of the sensor (still works though!). An alternative method would be to use ultra-sound sensing or capacitive sensing. That’ll be a topic worthy of its own project. For now, I’m happy with what I’ve made.
Happy coding!